Routers
Precautions
- The Router supplied with Plato is specifically configured for it. Use this configuration to ensure proper operation.
- Don’t reset the Router
- Supplied devices must only be connected to the Router
- Follow the instructions below to avoid any issues
Router removal with Upgrade to Plato 2.0
You can now update Plato and install version 2.0, which will give you 2 options:
- You can keep the router and use its Wi-Fi network.
- You can unplug the router and connect Plato and the tablet directly to your own Wi-Fi network. Go to Settings / Internet and change network.
It’s now possible to use Plato without the tablet, mapping directly from the robot, without a tablet and without Internet connectivity.
Setting up the router
Wifi router and 4G Module
1
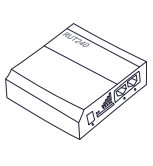
Unbox the RUT240
2
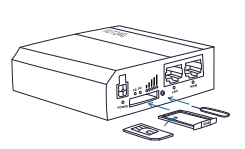
Insert the SIM card supplied by your retailer in the RUT240
3
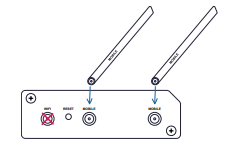
Attach the Mobile antennas to the MOBILE ports on the back of the RUT240
4
Connect the Power supply cable to the POWER socket on the back of the RUT240 and plug the other end into a power outlet
5
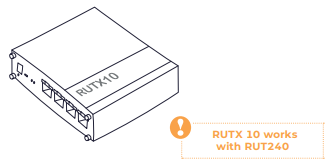
Unbox the RUTX10 and
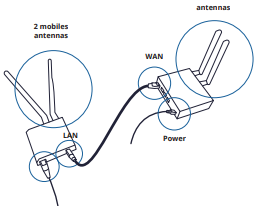
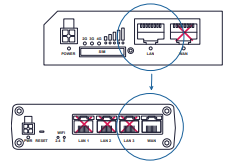
- Connect an Ethernet cable to the LAN port on the RUT240 router
- Connect the other end to the WAN port on the RUTX10 Router
6
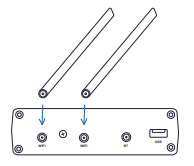
Attach both WiFi antennas to the WiFi ports on the back of the RUTX10
7
Connect the Power supply cable to the PWR socket on the back of the RUTX10, then plug the other end into a power outlet
Connecting Plato and the Tablet to the Router network
Once the Router is set up
1
Look under your Router to find its WiFi network information

2
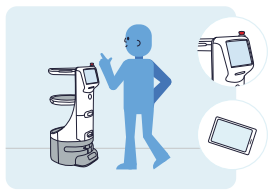
Follow the instructions displayed on Plato and the Tablet to connect them to the Router network
Troubleshooting checklist
Manufacturer documentation
WiFi Router
RUTX1O
4G module
RUT240
https://wiki.teltonika-networks.com/view/RUT240_Manual
-
documentation
- Delivery and Collecting Accessories
- Plato User Guide
- Plato’s Datasheet & Technical Spec
- Routers
- Safety & Security
- Troubleshooting guide
- Show Remaining Articles (1) Collapse Articles

